
Design and budget a bathroom remodel like the pros
When you design and budget your bathroom remodel, do it like the pros. Plan your bathroom remodeling project using a list that breaks down each phase of the work.
That’s the secret to making sure you don’t miss something critical. It’s your guide to your bathroom design, budget, and bath remodel schedule.
A bathroom renovation is a complicated home improvement. It’s also one of the most important. Every bathroom is different. But they should all be planned the same way.
You need to have a list just like one that a general contractor would use. In this post, we’re going to list the details for each phase of the work and each trade so that you can create your list and be in control every step of the way.
That list is the key to planning, budgeting, and scheduling your bathroom renovation. It’ll help you stay on budget. When you price out everything on a list, you can control costs by changing the design if you need to.
You can even manage how long it will take to do all the work by choosing materials that don’t need so much work to install.
And even before you begin the work, a good list will tell you the right sequence. You’ll know what work needs to be done next and when you’ll need the materials.
Without it you’ll find it difficult to figure out your bathroom remodeling cost. You’ll be renovating your bathroom without a plan that fully covers everything. And you’re going to feel stressed out instead of excited.
how to design and Budget your bathroom job
Use a comprehensive list to design and budget the bathroom renovation project. The design and the budget are connected at the hip.
First, you need the builder to guide the client through all the questions that have to be answered.
You need to do the same for yourself. Is this a guest bathroom or a master bathroom? Are you going to keep the existing bathroom layout, or do you want to make changes? Do you want to have a shower and a tub? Do you want one sink or two?
When you’ve answered all those questions and many more, a builder can give you a budget price for the job.
If you have a list like that, it can be a huge help to you. This is how you stay in control of the design and the budget as you price out your bathroom remodeling ideas.
You can choose to say “No” to that $2,780 tub and find something that’s only 20% of that price. Then, you can say “Yes” to the tile that costs $12 per square foot and still stay on budget.
Maybe you want to say, “Yes, I want a tub and a separate shower.” And if you do, you’ll know this might mean you need to hold back on something else to stay on budget.
In short, you stay in control as you design and budget a bath remodel. You choose how your design budget is spent.
How to Design First, then Order, and then Build

And, when you use a list as a guide to your bathroom remodel, you’ll be more likely to do the work in the right sequence and avoid making budget-busting mistakes. Those are hugely frustrating, time-wasting, and expensive!
When you have a complete list of what needs to be done and what has to get done first, second, and third, you’ll have more freedom to look for bargains that’ll save money.
And so, you might be able to order the tile you want even though it will take two months to get it. And you’ll also know you need the bathtub right away so you should choose one that’s in stock.
You’ll be able to plan when you buy each item on the list. Maybe you can wait for the sale you know is coming up.
These details can add up to hundreds or even thousands of dollars of savings.
If you’re going DIY, it’ll help to know how a pro would price and schedule your bathroom remodeling job
And if you plan to hire some subcontractors, you’ll know the sequence of when each of them should show up. You’ll also know what work they should do each time they arrive at your house.
How long will A Bathroom Renovation take?
If you hire a builder, your bathroom renovation will take between four and eight weeks, depending on the scope.
Add another three months before construction starts. This is the time you spend to design and budget a bathroom remodel. And plan to order any long lead items during this time.
So, three months for designing and ordering materials are followed by four to eight weeks of construction.
A DIY bathroom renovation schedule is going to take longer. But the guide to your bathroom remodel stays the same. And you can still help control how long it will take. You need to know about the ways that you can cut down on construction time.
If time is highly important to you, don’t change the layout of the original bathroom. Also, use pre-finished products that install quickly and easily. You get to design and budget a bath remodel on your terms.
It’s the difference between “Some assembly required.” and “Build from scratch.” Two examples would be shower walls assembled on-site or a shower niche that you just glue into place.
Pre-fabricated materials are often less expensive than buying and paying for the installation.
You can save both time and money during the design phase when you know what to look for. Set your priorities and stick to them.
Pre-Construction
How to Make A specifications binder
When you design and budget a bathroom remodel, put together a complete book of the specifications before work begins.
Download a photo, plus the installation instructions, as well as the cut sheet for every product you’ve selected and bought, from the shower head to the door handle.
And if you are hiring subcontractors for some of the work, they’re going to appreciate that you put in the effort to make a specifications binder. They’ll see you approach the job professionally.
It helps them to price of the project because they know exactly what you have in mind. That can go a long way in how the subcontractor prices out the work and deals with you.
How to Make Probes
There’s nothing worse than demolishing a bathroom and then realizing that the design will have to change because something that no one expected is in the floor or the walls.
Every builder has been through that. Everyone has their favorite horror story about starting a job and then having to stop for a month while a new design and budget for the bathroom remodel design were being worked out.
You can avoid these nasty surprises the same way that builders do: make some probes.
A builder will often cut small holes in walls and ceilings during the design phase of a renovation. This an easy way to confirm the size or location of a pipe or to figure out if a joist will be in the way of moving the toilet.
You can cover the holes with some plastic and blue tape until you’re ready.
Solve the problems before they become problems!
Bathroom Remodeling Sequence
The work in a master bath has to follow a certain sequence. If you know that sequence and the reasons behind it, you will have more control of the project.
From here on, I’m going to list the work in the sequence that you should follow. Stick to that sequence, and the job will be more efficient. You’ll save time. More important, you’ll save yourself from making mistakes!
Mobilization
This is the phase of delivering all the materials, fixtures, tools, and equipment.
If you’re doing this as a DIY project, you may not need to deliver everything at the very beginning of the job. That’s because the work might go on for months instead of weeks.
Try to plan to have everything on-site weeks before you need to install it. Even when you have the cut sheets, having the product itself can be really handy.
But if you’re working with a builder, they want to buy everything in advance. There are two reasons.
First, they avoid delays in waiting for materials to arrive.
Second, it helps them avoid changing orders. If owners know everything has been bought, it’s harder for them to choose something different.
Let’s face it, you will probably want to change something along the way. It’s human nature. Just be mindful that every change during the execution phase is going to cost you money.
The less you change, the more money you’ll have to spend on the project. And fewer changes also mean the job gets finished sooner. Win, win!
Install Shut-Offs
Shut down the water to the bathroom.
If the bathroom doesn’t have valves that isolate it from the rest of the house, this is the time to install a pair of valves called ball valves. It’s a small cost and a huge advantage.
Plus, you won’t have to worry about a flood if you cut a pipe or put a screw into a pipe!
Demolition
Phase 1 – Organizing Waste Removal
If you’re going to do this work yourself, your primary cost will be renting a dumpster.
One 20 cubic-yard dumpster might be enough to do the whole job from start to finish.
Call up some waste haulers in your area.
Let them know what kind of waste you want to put into their dumpster and how long you want to keep it. They can quote you a price once they have that information.
Insider TIP: If the dumpster is going to be on your driveway, have a pair of 2x8s to put under the rollers so the dumpster doesn’t damage the driveway surface. Also, if your renovation is going to inconvenience neighbors, offer up some dumpster space. It’s a great way to smooth ruffled feathers.
Phase 3 – Preparing The Space
Before you do any demolition work, plan how you can avoid getting dust all over your house.
And plan to do the protection before you do the demolition. If you do the protection on the same day as you begin to demolish the bathroom, chances are you’ll cut corners on the protection.
Phase 2 – Demolition Work
Now, the fun part. It’s time to start swinging the hammer.
It’s possible you can have the bathroom down to the bare walls in one day.
It’s always a great feeling to get the demolition done – to just be done with it.
Rough Carpentry
Once the demolition is done, it’s time for carpentry work. This section is always a little bit of a catch-all. The carpenters always have the job of filling in the gaps between the different trades.
A major bathroom renovation is likely to require all of the framing work listed below.
But for a smaller project, you’ll be able to eliminate some of this work. For instance, joist work is included in the list. That doesn’t mean you’re going to do any joist work.
LARGER PROJECTS
If you are going to move major plumbing fixtures like a toilet, tub or shower, you will need to redo the waste lines in the floor.
And if that’s the case, you might need to do some joist work. If waste pipes are going to be moved, you may have to do some simple reframing.
- Reinforce the floor joists after the plumbing work. If the plumber or you had to make holes in joists to run pipes through, the joists should be reinforced after the plumbing is finished. Holes in joists must always be in the center of the joist and must always be round.
- Do not cut out a square hole 3″ high by 3″ wide to fit a waste pipe. Make a round hole and then reinforce the joists.
- Install new plywood subfloor. Depending on the type of finished floor you might also need cement board underlayment. Plan to use both glue and screws to attach the subfloor to the joists.
- Frame for new medicine cabinets. If you’re moving your sink(s) and you plan to use recessed medicine cabinets, you will need to re-frame a wall for your medicine cabinets.
- Frame new entry door. You would do this only if the new layout means you need to move the bathroom entry door.
- Frame the shower curb. If you have a stand-up shower and you’re not using a pre-fab shower base, then this will be needed.
- Frame out any partitions inside the bathroom, such as partitions at one end of the vanity, to separate the tub from the toilet or for a new shower layout. Framing with metal studs can be faster, better, and less messy.
- Install plywood blocking for bathroom accessories. Put extra blocking where you intend to put towel bars, grab bars, or robe hooks.
- Frame ceiling and soffits.
- Frame access panels. This is for hiding shut-off valves or electrical splice boxes, for instance.
After the water lines are installed, apply reinforcing plates over the place where the water lines pass through studs. It protects the water lines from nails or screws.
This might be a perfect time to use metal framing to straighten out uneven existing partitions or to frame new partitions and ceilings so they are perfectly straight.
Make a story pole
In a bathroom renovation, alignments are really important. Getting them just right is the difference between a top-notch project and a so-so project. The way the pros achieve this is by creating a good old-fashioned story pole.
Get a stud and mark off every important horizontal line: the top of the tub, the center line of the shower body, the bottom of the niche, the height of the towel bars of tiles, of the windowsill, the height where the shower arm comes out of the wall and other details. Even in a small bathroom, a story pole can be a great reference.
Rough Plumbing
Your plumbing work is always divided up into two main phases.
Rough Plumbing is the work you won’t see after the project is done: the pipes and fitting under the floor and in the walls.
Install the waste and vent piping first. Then the water pipes go in.
There’s usually not much choice about how the waste and vent pipes have to be installed. That’s because some plumbing fixtures have to fit exactly on the waste line for that fixture. For instance, the waste line for the toilet has to be placed exactly where the toilet is going to go.
But the water line for the toilet doesn’t have to be located so precisely. Of course, you might have reasons why that water line comes out of the wall in one particular spot, but that might not make any difference to where the toilet sits.
Your tub and shower also have to sit on their waste lines. Those location lines have to be just right.
Rough Plumbing Worklist
- Rough-in for toilet (if your toilet is staying in place, even though it’s new, you might not have to do any work on the waste pipe).
- Rough in for sink. If the sink is not being relocated, you might not have to change the waste pipe. Technically, the “sink” in a bathroom isn’t a sink. It’s a lavatory. The waste line for a sink is bigger than the waste line for a lavatory.
- Rough in the bathtub and shower. Unless it’s a free-standing tub, it also gets set in place during the rough-in phase.
- Rough in for the shower waste line.
- Rough in for the shower body.
- Install shower base.
- Install insulation on water lines.
PRO TIP: If a waste pipe from a bathroom is going to run across in the ceiling of the Dining Room, Living Room or Family Room downstairs, don’t use PVC pipe for that part of the pipe. Use a length of cast iron pipe instead. It’s much harder to hear water running along a cast iron pipe.
Electrical Roughing
Now that the plumbing work is done, it’s time for the electrical roughing.
- Run the wiring for any additional switches. If you are not adding switches, lights or outlets, you might not have to run new wires. But, lighting is such an essential element of almost any design, I can’t imagine you won’t be adding lights during your remodel.
- Run wiring for new outlets. Consider adding an outlet inside a medicine cabinet or inside a vanity drawer.
- Run wiring for new lighting fixtures.
- Install recessed light kits and electrical boxes for new sconces. All lights in a shower or over a tub must be rated for damp areas. Wall lights are better than down lights at a vanity.
- Run wiring for exhaust fan.
- (Optional Upgrade) Run speaker wires. If you want to add speakers to your bathroom, you’ll have to plan spots for those. And even if you’re not installing them now, maybe future-proof your house by adding a splice box in the ceiling.
Ventilation
- Install ductwork for the exhaust fan. There are two things you want to capture: Steam and odors. If you can, locate the exhaust fan where it can capture both. And if that’s not possible, you can install a remote fan designed to have two ducts connected to it.
- When choosing a fan, look for a CFM rating (cubic feet per minute) not less than 50 CFM for a small bathroom. Fan noise is measured in Sones. The lower the Sones rating, the quieter the fan will be. Here’s a good ceiling-mounted fan. Fantech makes some excellent dual-outlet exhaust fans.
- Install fan, and it hook up to the ductwork.
Heating
- Install floor heat. A heated floor system is a relatively inexpensive luxury. The electrician would work with the tile installer to install an electric heat mat.
- Install piping for hot water heat. And if it’s going to be a typical hot water radiator or baseboard convector, the pipes go in at this stage.
Air-Conditioning
- Install ductwork for AC and/or forced air heat.
Congratulations! You’re ready to begin with finishing the work.
PREPARE FOR FINISHED WORK – You’ve invested the time to design and budget for a bathroom remodel you love.
Now, before the drywall goes up, spend some time looking around.
- Are you still happy with everything?
- Although you don’t want to make any changes, this is your last chance.
Visualize how finishes will align with one another. Are the switches, outlets, lights, and shower fittings exactly where you want them to be?
You don’t want to make changes at this stage, but if there’s something that bothers you, this is the last chance. Once the sheetrock goes up, changes can become expensive to make.
And once the drywall goes up, you’ll be able to feel the space!
Drywall
- Install insulation. If the bathroom has any outside walls, you’ll want to insulate them. Also, you may want insulation in interior partitions and floor to reduce sound transmission.
- Install sheetrock on the ceiling and soffits
- Install sheetrock on walls
- Install cement board on walls in wet areas
- Install corner beads
- Apply first coats of tape and compound on sheetrock
Take care installing the corner beads. Anything out of square or plumb in a bathroom really shows up. When you install the corner beads, you have a chance to correct any slight defects in the outside corners. Set all your corner beads with a laser level.
You’ll need to exercise patience now. The pace of the work will seem to slow down. Finish work takes longer than rough work.
Bathroom Tile and Stone
Confirm the tile layout For your Bathroom Remodel
Finally! Everything is ready for the first bathroom tile to be installed. I know you’ll want to jump right in. Patience. There’s one more step to do: take the time to lay out the tiles.
When you design and budget a bathroom remodel, the tile is critical. So, it pays to take the time to figure out where grout lines will fall. Plan where you’ll have cut tile and where you’ll have finished tile.
Dry Layout
You can do a dry layout. Mark out the floor of another room with blue tape matching the dimensions of a wall of tile. Take some tile and lay it out within the blue tape borders. Now, you get a chance to see how tile joints will work out.
Change the pattern of the tile until you achieve the look of symmetry or pattern you’re going for. Try to avoid having to cut tile into narrow strips that are a lot smaller than the full size of the tile.
For the horizontal layout, there’s one guideline to know about. If you have a tub, we usually begin with a full tile from the tub deck. But if that means we’d have to cut the piece at the floor so it’s only an inch or two wide, maybe rethink that layout.
Tile layout is a really important step to get the look you want. And if you selected a natural stone tile, you might want to move pieces around so you get a pattern you love. Set aside any tile you don’t care for till you find some corner where they won’t be noticed.
Your goal in all this is to go through the layout and decide where you want tiles to be cut and where you want full tiles.
Install Tile

- Apply waterproofing on the floor and two to four inches up the walls.
- Also apply waterproofing inside the shower on walls, floor, and any niches. Seal around the shower body.
- Lay the floor tile.
- Install wall tile
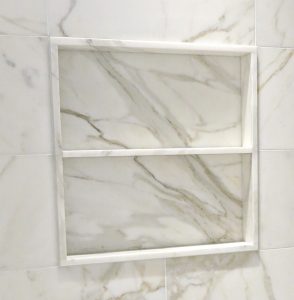
- Install shower niche
- Set the stone on the shower curb, the windowsill, and the room door saddle
- Apply the tile grout
- Set the vanity counter. This is one opportunity to save money. There’s a wide selection of counters and sinks to choose from.
But, if you’re using a pedestal sink, you won’t have that problem to deal with.
Trim Carpentry
- Install new room door and door trim. If you have wall tile on the entry door wall, install the casing before the wall tile. This way, you know exactly where the wall tile begins or stops.
- Also, install new window trim. If you have wall tile that’s going to butt up to the window trim, then install the trim before the tile goes on.
- If you intend to install wainscoting, this is the time to perform that work
- Ditto for crown molding (Optional)
- And if there’s going to be a wood baseboard in the bathroom, install it at this point
You can see that some of the things listed here are optional. But if you are installing crown moldings or wainscoting, this is the time to do it.
Millwork
- Secure the vanity in place
- Install medicine cabinet.
Mirror & Glass
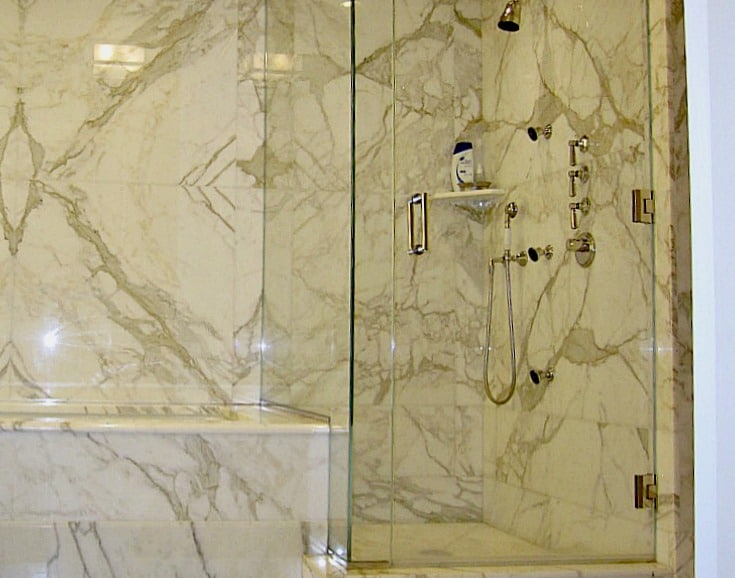
- Measure for the shower or tub enclosure once tile is installed. If this is going to be a custom-made enclosure, it takes a few weeks between the time it’s measured and when it’s installed.
- For a really professional and high-end look, the height of the enclosure should align with a grout joint or centerline of a tile. The hinges or wall clips should also be laid out so they are centered on a tile or on a grout joint.
Painting
- Prepare walls and ceilings.
- Paint walls and ceilings
Plumbing Trim
- Set the bathroom fixtures
- Install faucets, shower trim etc.
Electrical Trim
- Install trim kits for recessed lights
- Set the sconce lights or vanity lights
- Hook up the switches, outlets, and plates
Hardware & Accessories
- Install towel bars. Remember that early in the job, in the rough carpentry phase; you installed blocking for these? That pays off now. You don’t have to worry about finding studs or using the right anchors to hold the towel bar in place. Screw the accessories right to your blocking, and you’ll never have to worry about anything working its way loose.
Take the time you need to locate each item precisely. Do you want your towel bars aligned with tiles or some other bathroom feature? - Set the shower grab bars
- Place the robe hooks, TP holder, and cabinet door hardware
- Install room door hardware – and a door stop if needed to prevent the door handle from banging into a wall.
Congratulations! You did it!
First, congratulations for sticking with this post to the end. I hope I helped to clear up at least some questions for you.
There are so many variations to bathrooms, so many layouts, different materials and fixtures to choose from.
And then there are so many different trades that work in a bathroom. It’s impossible to cover them all fully here.
But you can go down through the trades listed here and prepare a list of the questions you need to answer so that you can get the budget bathroom renovation of your dreams.
Good luck with your bathroom project.


Budgeting your bathroom remodel on your own can really be a great idea. I will keep in mind all the points that you have shared with us today in this article and try to remodel my own bathroom the next time I plan to redevelop my bathroom. Thank you.
These are really good ideas and tips that you have said here. I would be really much willing to incorporate these into my bathroom!
Thanks for mentioning getting the right materials in place so that there are no delays. I’m wanting to remodel our master bathroom to be more modern looking and have a better vanity. I’ll have to find a good contractor to work with that won’t take forever doing the project.