5 Budget Friendly Projects That Will Transform Your Kitchen
Have you been dreaming about a kitchen renovation? Or maybe you’ve been thinking about some kitchen decorating ideas to spruce things up? A recent study suggests that a majority of homeowners plan to make some form of kitchen renovations within the next year. When I read that, I thought I’d put together a list of the best low-budget DIY projects that can transform your kitchen.
These budget-friendly kitchen ideas will make it look like you’ve done a whole kitchen renovation!
Best of all, you can accomplish each one of these kitchen projects without making a huge mess. Your kitchen will be usable every single day.
1. Install LED Counter Lights
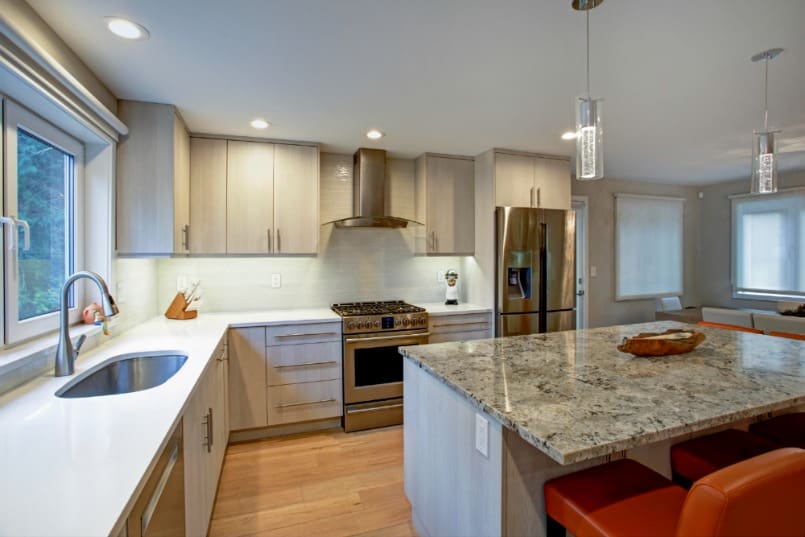
LED under cabinet lighting is the most practical as well as the most attractive type of kitchen accent lighting. LEDs use very little energy and they give off no heat. Installation is a breeze because most of the wiring is low voltage. No worries about getting a shock!
Under cabinet lighting should be part of any kitchen remodel because it’s aesthetically pleasing and is the best kitchen task lighting there is.
How to choose the right type of fixture
The first step is to select a LED counter light fixture you’ll love. First, decide if you want to have a continuous strip of light or a series of individual lights.
Continuous LED Light Fixture:
- A continuous light is usually the simplest and most versatile type of installation. This Armacost Ribbon Flex tape is very well known. The Home Depot kit includes parts to connect lights together.
Puck Lights:
- Puck lights are one of the most common kinds of individual lights. They are easy to wire and install. But, you might find it’s not so easy to hide the wires. When choosing a puck light, you’ll want a fixture that’s thin so that it doesn’t protrude below your cabinet.
Color Temperature:
When you choose the fixture, one of the most important choices is the color temperature.
I recommend you choose a fixture that’s no greater than 3,000k. That temperature will give you a warm white. And if you want something even warmer, look for a light that’s 2,700k – that’s about the equivalent of the light from an incandescent bulb.
Additional Purchases:
Once you’ve found the LED counter lights, you’ll need to purchase pieces to connect one light to another. The Armacost tape has splice connectors. I suggest you pick up a couple of extras of each for your own installation.
You may also need a driver that’s compatible with the lights. The driver is a little like the transformer brick on a laptop charging cable: it takes the electricity from your house and converts it into the kind of electricity the LED uses.
How to install LED under cabinet fixtures
- Cut the strips of tape light to the length of the upper cabinet.
- You won’t be able to match the length exactly but that’s okay.
- Most tape lights are designed to be cut in 2″ increments. So, you can cut a light to be 12″ long or 14″ long but not 13″ long.
- Install each strip of tape to the underside of the cabinet. Place the lights towards the front of the cabinet to get better illumination of the counter and avoid disturbing shadows on the backsplash wall.
- Connect each fixture to the next one to create a daisy chain. These connectors are small plastic pieces that the tape light clips into. LED lights are low voltage so the wires are very lightweight.
- Some lighting kits include the connectors. Sometimes they are bought separately. Do yourself a favor: buy extra connectors!
- Once you’ve connected all of the lights to one another, connect the first light to the driver.
- Put the driver on a top shelf of a cabinet or even on the top of the cabinet. Run the last wire from the final light in the daisy chain up to the driver.
- Wire the driver to a switch or dimmer.
- That’s the only part of the whole installation where you are working with line voltage. Everything else is low voltage.
Before I leave the topic of kitchen lighting, this might be a great time to also change your main ceiling lighting or pendant lighting over your kitchen island. The goal is to have all of your lighting close to the same color temperature. A lighting change can do so much for any room.
2. Install a new kitchen backsplash
Once you’ve installed your counter lighting, your eye will be drawn to your backsplash. Is it time for an upgrade?
At one time, the only choices for backsplash tile were ceramic, stone tile, or stone slab. All of which are relatively expensive as well as messy to install. Nowadays, a kitchen backsplash can lend elegance, whimsy, color, texture and all of this in an easy peel-and-stick vinyl tile package!
Choose your backsplash
Vinyl tile has come a long way. It’s being used as a wall surface material more than ever before. Here’s a classic vinyl subway tile and here’s a herringbone Carrara in vinyl. And you can see the range of quality reflected in the pricing. Vinyl tiles runs from $2 a square foot to $20 per square foot!
Depending on your existing surface, you can install new vinyl backsplash in a couple of hours.
Plan your backsplash layout
Before you make your final selection of the size and the pattern, measure your current backsplash. Plan your layout. Do your design work. I promise, you’ll be glad you did. The difference between an okay DIY project and a great DIY project is often in the design work.
Lay out the pieces of vinyl tile on your kitchen counter so you can see how the pieces will run along the length of the counter. This is how you work out the little details. Where will you start with a full tile? Where will you have a cut tile?
Most people just assume they should start with a full tile at an inside corner. But, you don’t want to do that and then realize you have to cut the last tile in the row so it’s going to be only 2″ wide. You might find that the backsplash looks best if you lay out from the center of the length of the counter. Or that you want to line up tile joints with upper cabinets.
It’s fun to think these things through. You’re not just taking a product and installing it. You’re designing each detail of how your kitchen will look. Months from now you’ll have the satisfaction of looking at some detail that you know you worked out just the way you wanted it to be.
Your layout may be interrupted by window or door trim. This might be the perfect time to think about a Door Trim Upgrade.
Vertical layout
The height between the counter and the upper cabinets in your kitchen is probably somewhere between 18″ and 20″. Unless the vinyl tile fits exactly into that vertical size, you’re going to cut the top of the top tile.
Let’s say you have 18″ of space for your backsplash. If you pick a tile pattern that’s 3″ high, you’ll have exactly 6 full tiles from counter to upper cabinet. A 4″ high tile pattern wouldn’t work perfectly because you would have four pieces of 4″ tile and then you would cut 2″ off the top tile. Personally, I’d be fine with that but this is your kitchen and you’re the designer!
If you choose a pattern that has very narrow tiles laid out horizontally, this cut at the top might mean that you’ll show only a small sliver of that last tile at the top. So, if possible, choose a tile pattern that will work with the space you have.
Horizontal Layout
Also measure the length of the counter and choose a tile that will work well with the overall length dimension. If your counter is 98″ long then you probably don’t want a tile that’s 12″x12″ because you’d need to work out how to deal with the 2″ that would be left over, right?
Prep work for vinyl tile install
Vinyl tile can be glued on top of ceramic tile. You will need to clean the existing tile thoroughly to remove any grease or anything else that will interfere with the vinyl sticking to the tile.
If your backsplash has wide grout joints or if the tiles are very uneven, no worries. You’ll just need to do some additional prep work. You could remove the existing tile and prepare the surface underneath to make it flat. That’s likely to be messy.
Another way is to apply a 1/4″ thick layer of hardieboard over the existing tile surface. That’ll give you a brand new sub-surface. I don’t recommend using plywood instead of hardieboard or cement board. The sub-surface should be water resistant.
Now that you have a brand new backsplash, maybe this is the time to upgrade your outlets? How often would you use a USB outlet if you had one in your kitchen?
3. Upgrade your cabinet storage
When clients talk about their priorities for kitchen renovations, efficient cabinet storage is always close to the top of their list. Whether it’s a small kitchen or a large one, I’ve never heard anyone complain they had too much storage in their kitchen!
And, some of the best DIY kitchen design ideas are all about storage. There is a wide variety of affordable cabinet inserts. They are designed to give you easy access to every nook and cranny in your cabinets.
Corner cabinet inserts
Inside corner cabinets are sometimes a huge waste of space. Even if the corner isn’t totally blocked off, it can be really inconvenient to use the space. Here’s one Lazy Susan solution. And there’s another take on the lazy susan corner cabinet storage problem: these rounded door-mounted shelves are designed to occupy most of that lost space and still provide really convenient access.
Base cabinet inserts
This two-shelf pull-out by Rev-A-Shelf for instance is just one of hundreds of convenient storage solutions. If you’re used to reaching into shelves in your lower cabinets, you’re going to love some of these pullouts. You may not be familiar with Rev-A-Shelf but they are one of the biggest names in cabinet storage solutions.
This stainless steel pull-out basket system is designed to give you easy access into the dark recesses of a sink base cabinet.
4. Upgrade to self-close and soft-close
Self close and soft close hardware has been around for awhile now in upscale kitchens. It’s not even discussed as an option anymore. It’s just assumed.
The good news is that these options have become so popular that we now have inexpensive hardware to install and turn your original hinges into soft-close.
And this is a really satisfying DIY project. The results are immediate. You’ll find yourself opening and closing drawers and doors just for the pleasure of watching them softly close.
Soft close doors
Would you like to make the sound of a cabinet door bang shut a thing of the past? Just swing the door shut as you normally would and watch how it slows itself down and closes softly.
To make this work you won’t even need to take the doors off the cabinets. Just remove one of the hinges from each door and replace it with these soft close hinges by Blum. I usually advise people to replace the top hinge first.
Depending on a few different things, one soft close hinge per door may not be enough. If one hinge doesn’t do the trick, replace another hinge.
If you’re not sure you want to change out your hinges, check out these dampers. They’re simple to install. They mount on the hinge side of the door. As the door swings shut, the damper will slow it down for the last few inches so that it will close every so softly.
Soft close drawers
For drawers with side-mount glides, you can easily install this hardware to turn your wooden drawers into soft close drawers.
BUT, this works only on side-mount drawer hardware. If your hardware is mounted under the drawer, this won’t work for you.
5. Upgrade your cabinet hardware
One of the simplest changes you can make is to install new door and drawer hardware. The choice you make for new hardware can have a really big impact on the overall look of the cabinets. Most of the design professionals I’ve worked with, make this one of their last design choices because they want to know how everything else fits together first.
Avoid these common mistakes when you buy your new hardware.
Make sure that the new hardware fits exactly onto the holes for the original hardware.
When you plan to keep the same finish on the cabinets, make sure that the new hardware completely covers where the old hardware was. Otherwise you might notice a difference between where the old hardware covered the finish and where the finish was exposed. That mistake could ruin the whole look you were going for!
When you go hardware shopping, take one of the original handles with you. This way you can check that the new hardware will fit in the same holes.
It sounds like a lot to think about. It isn’t really. But choosing cabinet hardware can be a big decision. My advice is this: take your time selecting the new hardware. Take more time selecting it than it will take you to install it!
Summary
At the beginning of this post I promised to tell you about a kitchen transformation that’s simple, inexpensive and can be done without creating a mess! Here’s the list.
- Install backsplash lighting
- Change your backsplash
- Add some much needed storage accessories
- Upgrade to soft close doors and drawers
- Upgrade your decorative hardware
Every one of these projects are within the range of even a novice DIYer. In one weekend you can completely change your blah kitchen into something light, airy, more usable and more of a joy to use!
I could go on and on with other more advanced (and more expensive) kitchen upgrades. And maybe I will.
But for now, put these ideas to work and enjoy!

