
DIY Metal Stud Framing
There are plenty of reasons to use metal stud framing instead of wood studs. If you’ve been put off doing a project because of dust, noise or delivery problems, steel studs might be the perfect answer for you.
I’m not saying that steel studs are right for every circumstance. They’re not. They’re not the right choice for a bearing wall in a wood frame house.
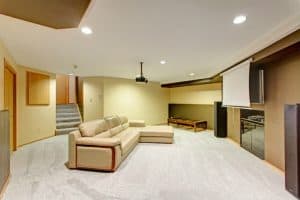
But, if you live in a high rise condo, your partitions are probably framed in steel. If you’re finishing a basement, steel drywall framing might be perfect for you.
The advantages of metal stud framing
Steel studs are nice and straight. That matters. The sheetrock on a wall framed with steel studs and track is going to be a flatter surface than the sheetrock on a wood framed wall.
Steel doesn’t swell and shrink because of moisture. Wood studs do. Why do we care? Because the swelling and expansion is one of the reasons that the compound covering the sheetrock screws pops out.
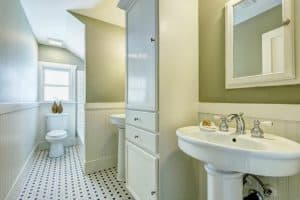
And steel stud framing is a great choice if you’re finishing off a basement or a bathroom where moisture could potentially be a problem. The screws may rust but the track and studs won’t.
Cutting studs is quiet work: no power tools needed. So you might be able to work later into the evening. And let’s not forget, you won’t have to clean up any sawdust from cutting studs!
Best of all, steel studs are less expensive than wood.
Working with steel framing
If you’re new to steel framing, the work will go slower at first. It does take some getting used to. You’ll even have to think differently about how framing is done.
But there are time-savers too. Loading in the materials will go faster. You can carry a bundle of ten steel studs fairly easily. Not too many people can carry ten wood studs around!
It’s easy to join steel studs together to make them longer. This is often a problem in a building where the ceilings are high and the elevator isn’t tall enough to take in the length of stud you need.
You can use a piece of track as a joining plate to connect two shorter pieces of stud. That’s a lot simpler than trying to do the same thing with wood studs.
Parts & Tools
If you haven’t used metal framing, you might not be familiar with the parts and tools you need. But it’s not complicated.
The track and studs come in a range of sizes. The most common widths are 1-5/8″, 2-1/2″, 3-5/8″ and 6″. You can see that those last three sizes are very close to wood stud sizes.
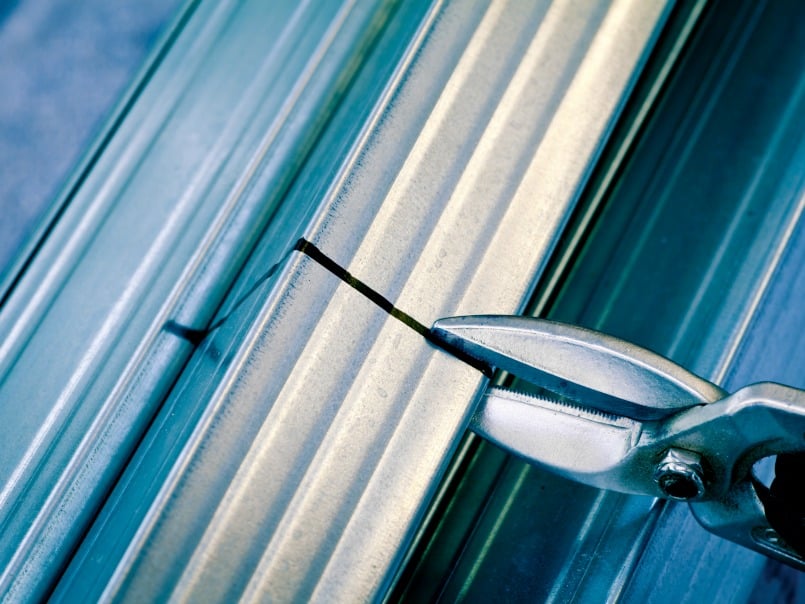
To cut the track and stud use aviation snips. Cut the sides of the track or stud first, bend backwards and cut through the web.
For a typical steel stud wall, you’ll need track for the top plate and bottom plate. Track comes in 10′ lengths. Studs come in 8′ lengths and then in 2′ increments up from that.
The tracks go in first and then the studs slide into the tracks. And then they’re screwed in place.
You’ll need zip screws to connect the framing pieces together. Learning to use the screws can be frustrating in the beginning. If you’re used to hammering nails, you won’t get the same satisfaction from screwing metal studs to track!
These clamps make it much easier to hold track to stud while you’re driving the screws.
Pro Tip: When you’re cutting studs, cut them a quarter-inch short of the total height. With wood framing the studs have to fit tightly between top and bottom plates. Not with metal stud framing.
The studs shouldn’t be forced into place. Leave them short, clamp them to the track and then screw the stud to the track.
Framing ceilings & soffits easier
If you’re going to frame out some soffits, metal and ceilings get some 2″x2″ corner angle.
Soffits are one of the areas where steel framing can save you a lot of time. Install an angle on the wall at the height you want the soffit. Install an angle on the ceiling at the right distance out as far from the wall as you want.
Then hang sheetrock off the angle mounted to the ceiling, screw another angle onto the inside of the sheetrock at the same height as the angle on the wall.
Drywall screws come in various lengths
The most common lengths of screws for hanging sheetrock are 1″ and 1-1/4″. In the beginning, screwing sheetrock to metal studs isn’t as easy as to wood studs. It’s just different. The steel studs aren’t as rigid as wood studs are.
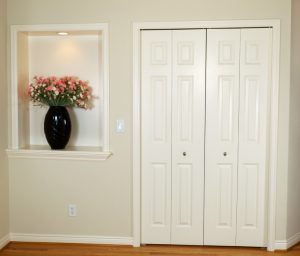
Installing Doors & Trim
If you’re going to hang solid core doors, then plan on making the metal stud opening large enough so you can line it with 3/4″ plywood. That’ll make it easier to mount the door frame. And it’ll also stiffen the wall at that point.
Also, let your sheetrock run through any doorways then come back and cut the sheetrock once you’re done on one side of the partition.
Installing wood trim is going to be different also. For baseboard and casings get yourself some trim screws. The square-head type give a more positive grip with the screw tip of a screw gun. The most commonly used lengths are 1-5/8″ and 2-1/4″ screws.
A screw gun works better than a drill for screwing into steel. But, if you’re just going to use the steel studs occasionally, you don’t need to go out and buy a screw gun. But, you should have a screw setter so that you can control how deep the screw penetrates the sheetrock. You want to avoid letting the head of the screw go past the paper surface of the sheetrock.
You might approach your first steel framing job warily. But, put in some time with it and you’ll have a new way to solve DIY problems!
Good luck with your project!


Thanks for sharing this info! You mention that it’s easy to join metal studs; how do you recommend doing so? To get weeping tile installed, I removed 2 feet of drywall all along the perimeter of my basement. I also cut the bottom 6″ of steel studs and removed the tracking. Now I’m trying to figure out how to redo what I undid. How can I extend the studs to join the missing 6″ from the bottom? I’d obviously like to avoid removing the entire drywall and what’s left of the studs. I also don’t want to mess up the drywalling by creating unevenness along the flange. Thank you for your suggestions!
Agreed! Steel stud framing is also an excellent alternative for completing a basement or bathroom where moisture may be an issue. https://phxmetalframing.com/
Hi I’m trying to create a rectangular opening in an existing drywalled and painted wall for an electric fireplace insert. I assume after I cut the opening into the drywall, I’ll be cutting the vertical metal studs that are blocking the opening and adding a track on the top and bottom as header and footer. I assume I snip the 2 ends of the header and footer and and bend back so I can screw them bent portion into the left and right uncut studs, with the cut studs fitting into the tracks and also screwed. After that I’m lost….can I just sit the fireplace insert into the opening and put its cover plate on to hide the drywall cut, or do I have to drywall all the sides of the opening? or do I just add an L shaped metal drywall trim to screw the existing drywall to the header and footer tracks (after adding more drywall?)
Hi Mahmod. You have the general idea about how to create an opening and re-frame it. If this is an interior partition there are no issues with insulation. If it’s a demising wall (a wall separating one apartment or townhouse from another doing as you describe will compromise the fire-rating of the partition. You don’t need to return the drywall into the opening. You can use an “L-bead or a “J-bead” to finish the opening. But if you’re taping skills aren’t great perhaps an unobtrusive wood trim surrounding the fireplace would work for you. And of the fireplace has a flange that covers the opening you’ve cut, you don’t need to do anymore than you’ve described. Cut opening. Frame header. Place fireplace so the flange covers the cut drywall edges.