
7 Simple Tips to Control Construction Dust (+Protect Your Family)
Controlling Construction Dust is vital to maintaining a clean job site. I’m going to walk you through some of the tools, materials and methods that you can use to control dust during remodeling projects. If you’re about to launch on a remodeling project, whether it’s a DIY project or a job done by contractors, there will be information here you won’t want to miss.
One of the frustrations of spending a weekend on an exciting DIY project can be the clean-up. If all has gone well, perhaps you’ll only need to spend an hour on your clean-up.
But, if dust has spread beyond the area where you were working, everyone’s frustration goes up. And dust does love to travel through any opening no matter how small!
Construction dust can be hazardous to our health. It’s worth taking some time and effort to protect our families as we remodel.
The good news is that with just a little extra effort and with the right products on hand, dust can be kept to a minor inconvenience and not a hazard.
A good remodeling contractor knows that dust protection has to be factored into the costs. So contractors look for the best materials and methods that will hold costs down. Skimping on protection exposes everyone involved to greater risk and hassle.
We need to protect our families and ourselves (and in an apartment, our neighbors too)!
Those contractors have the right materials and tools to contain construction dust and control their costs. I’m going to share with you some of the same materials and techniques used by the pros in controlling construction dust. This is one place where an ounce of prevention is worth a pound of cure – both in frustration and in your own health.
If you are a homeowner about to hire a contractor, this list will be useful as you review what dust-control measures will be used on your project.
These 7 tips will help make sure your next project is your cleanest one ever!
THIS POST CONTAINS SOME AFFILIATE LINKS FOR YOUR CONVENIENCE (WHICH MEANS IF YOU PURCHASE AFTER CLICKING A LINK I WILL EARN A SMALL COMMISSION, BUT IT WON’T COST YOU A PENNY MORE)! YOU CAN FIND MY FULL PRIVACY AND DISCLOSURE POLICY HERE
1. Separate The Work Area From The Rest of The Home

![]() The best way to do this is with Zip Wall or similar products that create a tight plastic barrier to contain the work area.
The best way to do this is with Zip Wall or similar products that create a tight plastic barrier to contain the work area.
With Zip-Wall poles and accessories plus a roll of 3ml plastic you’ll be able to isolate areas in very little time. And more importantly, the ZIP Wall barriers won’t damage floors, ceilings or wall finishes.
After you’ve installed a physical barrier, don’t forget to block up any HVAC grilles. And if you live in an apartment, be especially conscious of closing up any exhaust grilles in kitchen and bathrooms.
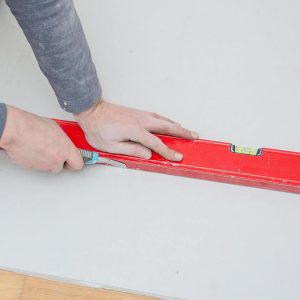
TIP. Ever hesitated to tape a plastic barrier to a floor, wall or ceiling because it might damage your finishes? Of course you have. Here’s a solution. Let’s use the floor as an example.

Apply some blue tape flat onto the floor. Then use a stronger tape (duct tape anyone?) to tape the plastic to the blue tape. Good old duct tape or masking tape will adhere to blue tape and to plastic very nicely.
Now you have the best of both worlds: a strong bond without damage to finished surfaces!
A good way to get started with Zip Wall is to buy a starter kit as in the link below.
 After that, you can buy individual poles and other accessories as needed for your house.
You will need plastic sheeting to use with Zip Wall (and for one hundred and one other things!). I recommend the 10’X100’ roll.
A 10’ wide section of plastic can be run horizontally from ceiling to floor in most houses. Narrower rolls will just mean you’ll have to tape a horizontal joint in your dust barrier: not ideal.
So, the 10’ roll will work very nicely. And the 3ml thickness will be sturdy and hold up to the wear and tear well.
2. Install A doorway into the Plastic Barrier

![]()
![]() Next you’ll need to have a way of getting in and out. Gone are the days when the best we could do was to overlap two pieces of plastic!
Next you’ll need to have a way of getting in and out. Gone are the days when the best we could do was to overlap two pieces of plastic!

Now we can erect a plastic dust barrier and cut a zippered door into it.
First time I saw this at a trade show was one of those “Duh! Why didn’t I think of that?!” moments. It’s so simple! Where had this been my whole life?!
To create the doorway, you’ll need a peel-and-stick zipper.
Alternatively you can use this magnetic version that turns your construction doorway into a self-closing dust barrier.
3. Stop Dust At The Door

![]() People moving back and forth between the work area and the rest of the house, can track dust with them.
People moving back and forth between the work area and the rest of the house, can track dust with them.
These sticky mats are a great way to make sure people don’t track dust from their shoes through your house.
And for those times when people do have to move to a finished area of your house, have them first cover their shoes with these booties![]()
4. Keep Dust On The Floor

![]() Dust can be spread when it’s being swept up. We’ve all seen it: we’re sweeping up all that fine sheetrock dust and no matter how careful we are, the dust rises and it gets airborne again.
Dust can be spread when it’s being swept up. We’ve all seen it: we’re sweeping up all that fine sheetrock dust and no matter how careful we are, the dust rises and it gets airborne again.
Now it has another chance to float away and get into places you don’t want it to be. The best way to keep that from happening is by using a sweeping compound.
Take fistfuls of sweeping compound and throw it around to spread it over the floor. The particles of sweeping compound are designed to stick to the dust particles and prevent the broom from raising dust.
Sweeping compound comes in two colors: Green and Red.
Green is water-based and red is oil-based. I’ve only ever used the green sweeping compound. I’d also suggest getting a non-sanded sweeping compound such as this one:
5. A Negative Air Pressure Machine

Clean Dust Out of The Air. A negative air pressure machine is one of the most effective ways of keeping dust under control. It’s a large fan pulling the air through a filter and expelling it out a window or other suitable opening.
The heavy duty machines are designed to pull 1,000 to 2,000 cfm. That’s the equivalent of exchanging all the air (within one minute!) of a room that measures 10’ x 12’ x 10’ high.
There are also many smaller machines that will move 300-600 cfm – perfect for projects limited to one room area.
You can tell that the machine is doing its job for you: if the plastic barriers are billowed inward towards the negative air pressure machine you know that the air pressure inside the work space is lower that the pressure outside.
 You can go on with the work knowing your family and your home is protected against dust contamination.
All that dusty air that’s being expelled from the worksite is being replaced by clean air coming from the either the outside or from the rest of the house.
Instead of air leaking out from the work area, the negative air-pressure machine expels air so quickly it reduces the air pressure in the worksite and pulls air from other areas to try to equalize the air pressure.
That’s an expensive piece of equipment.
![]() There are smaller, less costly models that move less air. But if you’re just working in one room one of these would do nicely.
There are smaller, less costly models that move less air. But if you’re just working in one room one of these would do nicely.
6. Capture Dust At The Source

![]() It’s pretty simple these days to capture most of the dust from stationary power tools by connecting the hose of your shop vac. It’s just as important to capture the dust from portable power tools.
It’s pretty simple these days to capture most of the dust from stationary power tools by connecting the hose of your shop vac. It’s just as important to capture the dust from portable power tools.
More and more companies are bringing out their own versions of tools to compete with Festool which is the market leader in dust-controlled power tools.
If there are no other options, hold the hose of your vacuum cleaner close to the tool that’s creating dust. With care you can capture a high percentage of dust this way.
Maybe the worst of all is sheetrock dust (when cutting sheetrock) and compound dust (when sanding walls and ceilings). Capturing this at the source can be difficult. There are several “dustless sanders” that will capture most of the dust generated. For smaller projects this handheld tool is very useful for capturing dust. ![]()

It might be hard to justify the expense of a dedicated drywall sander for small projects. But they do reduce a whole lot of dust and hassle!
For larger projects you might want to consider a professional tool such as the Porter Cable 7800. Regardless of which tool you choose, look for lightweight and good balance.
These sanders begin to feel heavy very quickly especially if you’re working overhead!
7. A HIGH-QUALITY Quality Dusk Mask
Construction dust can be very unhealthy. It’s certainly unpleasant. Luckily, we don’t have to be subjected to it.
Be sure to find a dusk mask for the exact purpose you’ll need it for. For instance, a dusk mask that protects paint odors doesn’t protect against chemical fumes.
You’ll also have to find a mask that will fit properly, because otherwise unwanted particles can sneak in under the mask and intensify the dust problem.
Make sure to do thorough research to find the correct dusk mask for your project.


I liked that you suggested using sticky mats in order to make sure that the dust won’t track from the shoes to the house. My husband and I are planning to have our 24-year old roof replaced next weekend due to its old age. The last thing that we want to happen is for the interior of our house to be filled with dust, so we will do your tips and have a professional install a dust containment wrap.